The bridge from Intune to Defender for Endpoint
Introduction
This post is a straightforward tutorial to enable Defender for Endpoint with Intune. These two products live in the Microsoft ecosystem and can be natively integrated. It is a major advantage to connect your endpoint management product (Intune) with your XDR and security product (Defender for Endpoint). To establish the connection, follow this post.
Aims
These listed points are the possibilities and aims when you set up the connection:
- Sharing of device information
- Enhanced and unified security setting management (apply configuration settings to devices that are managed with Intune or not yet enrolled with Intune)
- Defender for Endpoint evaluates a risk level per machine that can be used in the compliance policy of Intune. This compliance policy can then be assessed through Conditional Access)
- Configure machine tags in Intune configurations to create dynamic device groups in Defender for Endpoint
Key steps
For the setup we need to:
- Enable and configure tenant connector from Intune
- Enable tenant connector from Defender for Endpoint
- Create an onboarding package from Intune
- Optional: set up machine tags for Defender for Endpoint device groups
Tenant connector
Initially, we need to enable the tenant connectors from both sides.
Intune
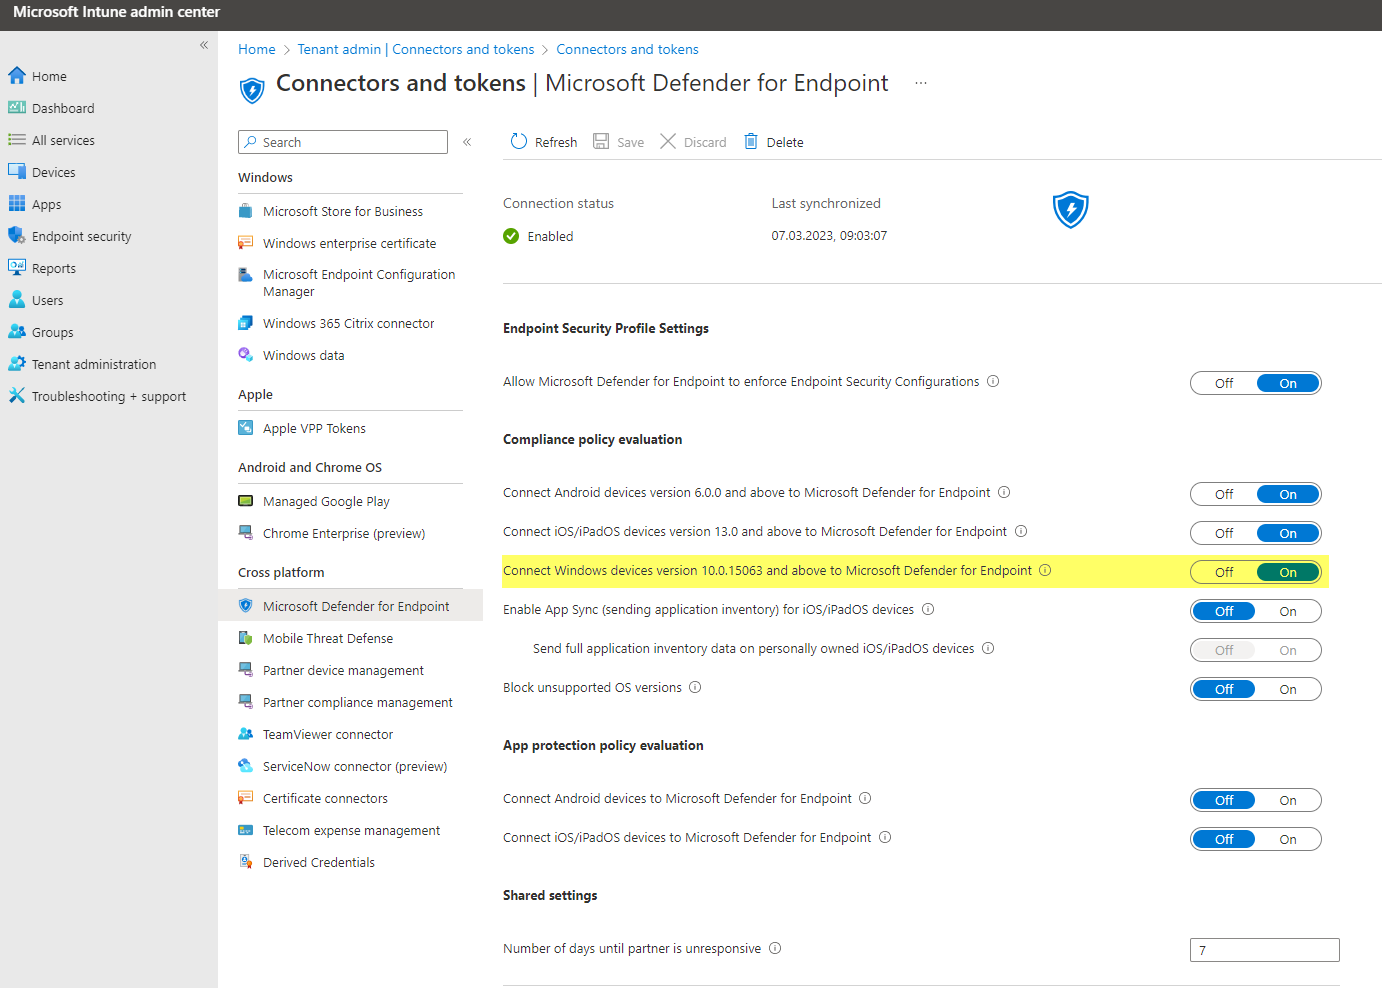
Intune portal>Tenant administration>Connectors and tokens>Microsoft Defender for Endpoint, here you need to enable the switch for Windows devices.
Defender for Endpoint
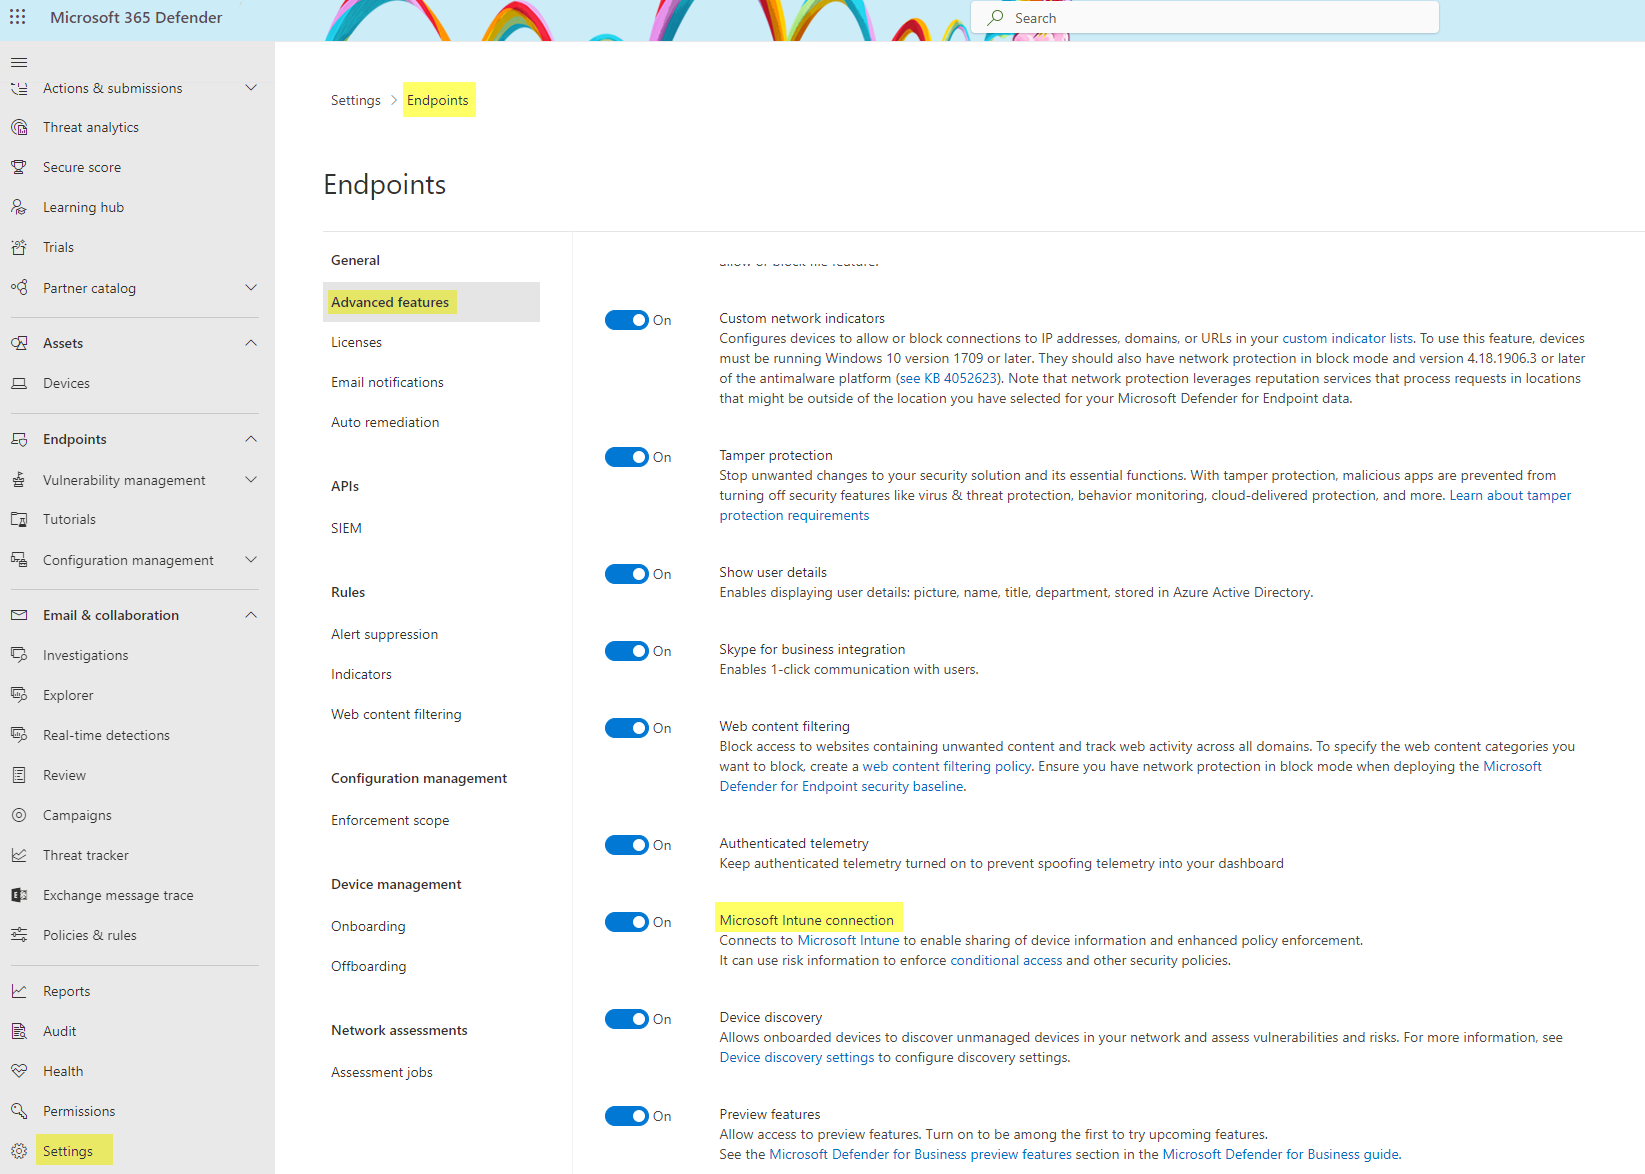
Microsoft 365 Defender>Settings>Endpoints>Advanced features>Microsoft Intune connection
Onboarding package
When the tenant settings are made, your clients will not automatically show up in the device inventory of Defender for Endpoint. Therefore we need an onboarding package, which will be deployed from Intune.
Go to Intune portal>Endpoint Security>Endpoint detection and response and create a profile.
Platform: Windows 10, Windows 11, and Windows Server
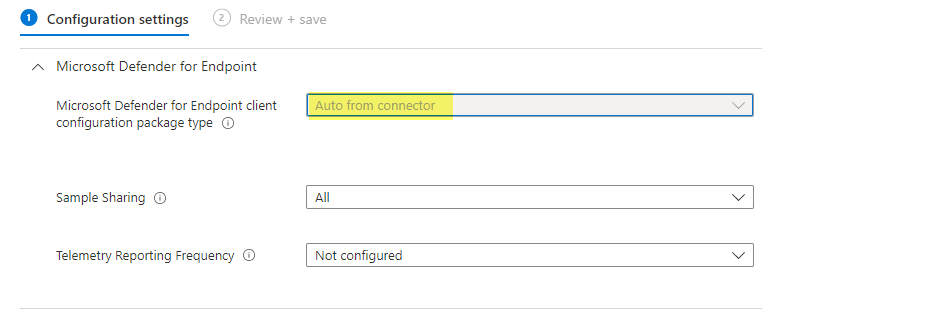
Configure the client configuration package type: Auto from connector
Save and assign the policy, ideally to device groups or all Devices.
Machine tags with Intune
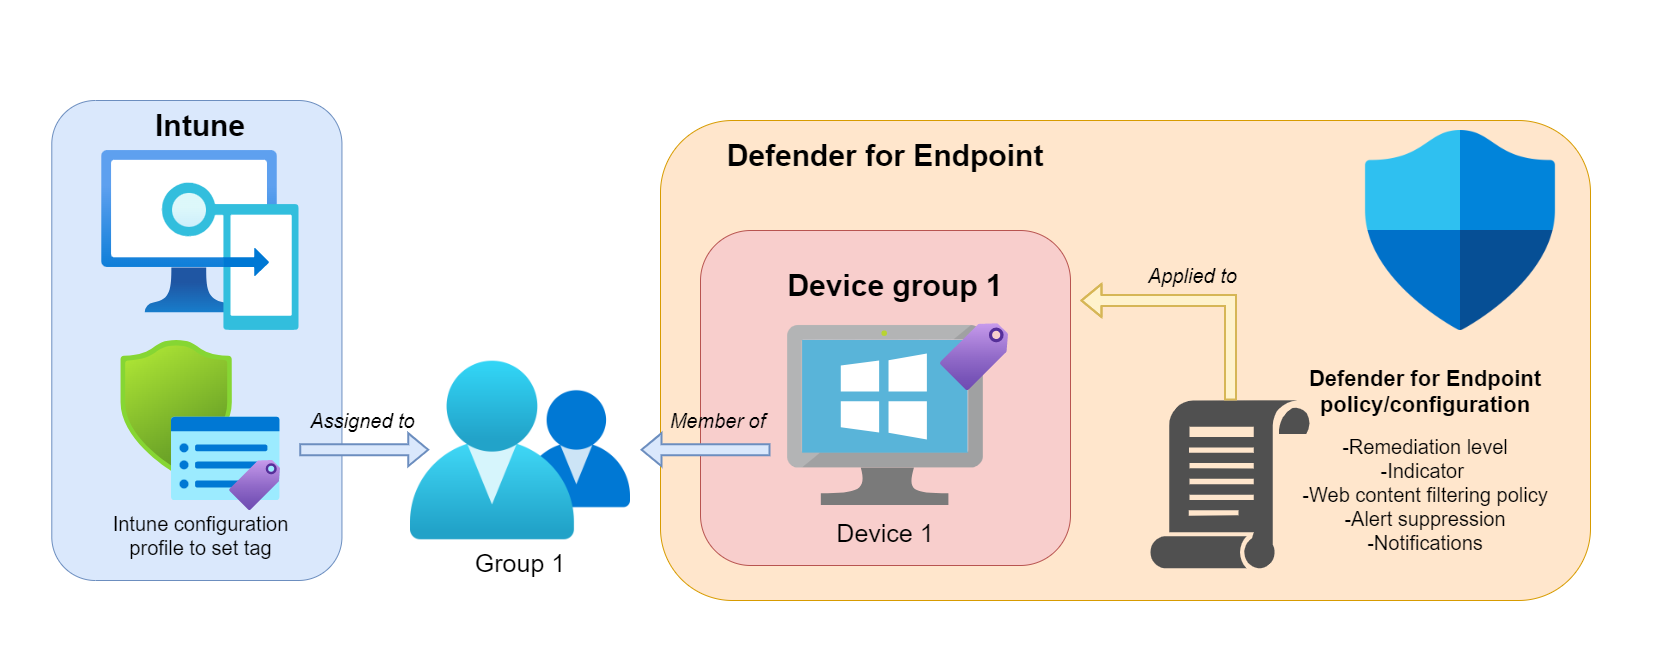
Machine tags are a good way to group devices into Defender for Endpoint groups. We can create an Intune policy to configure a specific tag and only assign the users/devices which should get this tag. With this you have a good way to distribute tags and dynamically group devices, since this is not possible built-in from Defender for Endpoint.
Note:
- Assignment to user or device groups is supported
- Only one tag can be given through an Intune policy
- The processing of the Intune policy can take some time
- Defender for Endpoint also needs some time to recognize the tag
->results, that policies won't get effective immediately
Then the machine tag can be used to create device groups in Defender for Endpoint. Find this in Microsoft 365 Defender>Settings>Endpoints>Device groups

Policies and controls that can be applied on the device group level include:
- Remediation levels
- Indicator actions (block, audit and allow)
- Web content filtering
- Alert suppression
- Notifications
Intune OMA-URI policy
To create a policy that sets the machine tag to the assigned devices and users, go to Intune portal>Devices>Configuration profiles>Create profile
Platform: Windows 10 and later
Profile type: Templates > Custom
| Setting | Value |
|---|---|
| Name | MDE tagging |
| Description | Adds a machine tag in MDE |
| OMA-URI | ./Device/Vendor/MSFT/WindowsAdvancedThreatProtection/DeviceTagging/Group |
| Data type | String |
| Value | Your tag |
Assign this policy to the desired groups, which should get the respective tag.
Registry
You can find the tag, set from the Intune policy in the registry:
HKEY_LOCAL_MACHINE\Software\Policies\Microsoft\Windows Advanced Threat Protection\DeviceTagging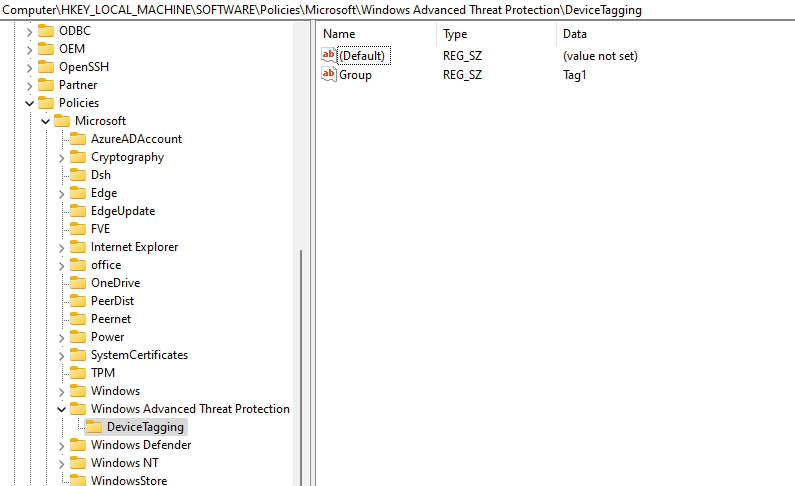
Other tagging approaches
Of course this described variant is not the only way to tag devices, you could also leverage:
- Defender API, tag devices from a CSV file with a PowerShell script

- Flow/Logic App, automate tagging through Advanced Hunting

Sources: TechCommunity and Microsoft


